How to Auto-Publish Articles to WordPress (Without Logging In Every Time)
Manual publishing kills momentum. Here is exactly how to auto-publish to WordPress using the REST API — with a step-by-step workflow, checklist, and the mistakes that break most automation setups.
To auto-publish articles to WordPress, use the WordPress REST API with Application Passwords for authentication. Send a POST request to /wp-json/wp/v2/posts with your article title, content, status, and any taxonomy IDs. The post goes live immediately when you set "status": "publish" — no login required, no copy-pasting, no dashboard visit.
That is the short answer. The full answer depends on what you are automating, how your content is produced, and whether you need a one-off script or a repeatable pipeline that runs without you. This guide covers all three levels.
The Manual Publishing Bottleneck
Every content team that publishes more than a few articles per month eventually hits the same wall: the writing gets done, the editing gets done, and then someone has to open WordPress, navigate to a new post, paste the content, set the category, upload the featured image, configure the SEO plugin, preview it, and click publish. For a single article, that sequence takes ten to twenty minutes. For ten articles a week, it becomes a part-time job.
The problem compounds quickly. When publishing is manual, it becomes a bottleneck that blocks everything upstream. Drafts sit finished and waiting. Schedules slip. Writers stop producing at pace because there is no point getting ahead when the queue is already backed up. The writing process and the publishing process need to be decoupled — and the REST API is how you do it.
Three Approaches to WordPress Auto-Publishing
There is no single right way to automate WordPress publishing. The best approach depends on your technical setup, the volume you are targeting, and whether you want to build something yourself or use existing tooling.
Direct REST API calls
The lowest-level option. You write a script — in Python, Node.js, PHP, or any language with an HTTP client — that sends a POST request to your WordPress site. Full control, no dependencies, works in any environment. Requires the most upfront setup and ongoing maintenance, but gives you complete ownership of the logic. Best suited for developers building custom pipelines or integrating publishing into an existing codebase.
Workflow automation platforms
Tools like n8n, Make (formerly Integromat), and Zapier have native WordPress integrations. You build a visual workflow that triggers on some event — a new row in a spreadsheet, a webhook from your CMS, a completed AI generation — and the platform handles the API call. Lower technical barrier, faster to set up, and easier to modify without touching code. The trade-off is that you are adding a dependency and a monthly cost, and complex multi-step logic can become unwieldy in visual editors.
End-to-end content automation systems
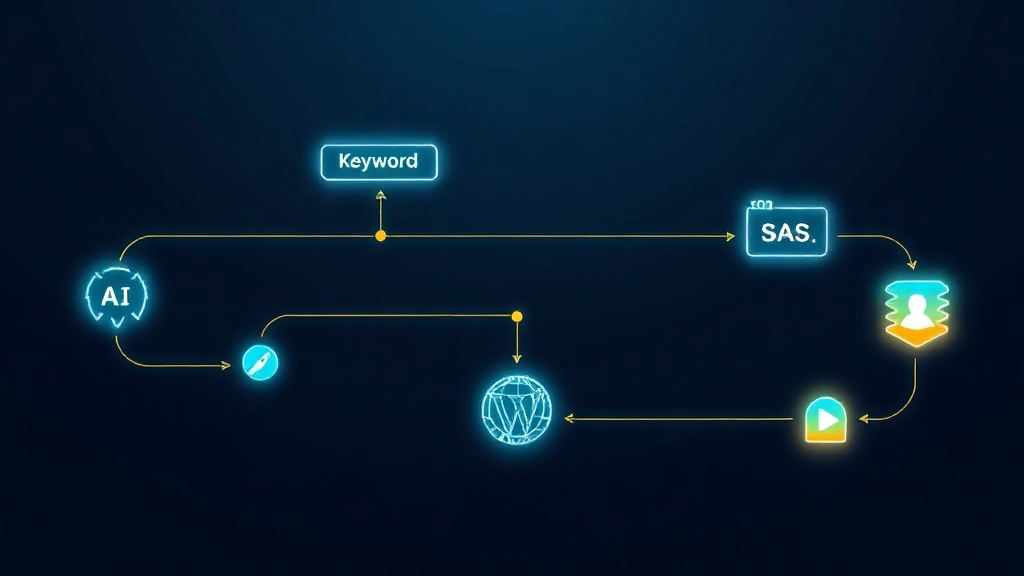
The third approach skips the assembly entirely. Tools like Zorenax handle the full pipeline from keyword research through content generation to WordPress publishing in a single automated workflow. You define what to write about, and the published post appears on your site — with featured image, SEO fields, and correct taxonomy — without manual steps in between. This is the right level of automation if you want to publish consistently at volume without building and maintaining the infrastructure yourself.
How the WordPress REST API Works
The WordPress REST API has been built into WordPress core since version 4.7. Every self-hosted WordPress site has it available at yourdomain.com/wp-json/wp/v2/. You do not need a plugin to enable it.
The posts endpoint accepts a JSON body with the following fields, among others:
- title — the post title as a string
- content — the post body as HTML
- status —
publishfor immediate publication,draftto save without publishing,futurefor scheduled posts - categories — an array of category IDs (not names)
- tags — an array of tag IDs
- featured_media — the ID of an uploaded media item to use as the featured image
- slug — the URL slug; WordPress generates one from the title if omitted
- excerpt — the manually set excerpt; WordPress generates one if omitted
Every request to create or modify posts requires authentication. The recommended method for automated workflows is Application Passwords.
Setting up Application Passwords
Application Passwords are a WordPress core feature (added in 5.6) that generate a dedicated credential for API access without exposing your main account password. To create one: go to your WordPress admin, navigate to Users → Profile, scroll to the Application Passwords section, enter a name for the application (e.g., "Content Pipeline"), and click Add New Application Password. WordPress generates a 24-character credential you copy once.
In your API calls, pass the credentials using HTTP Basic Authentication: your WordPress username as the username, and the Application Password (with or without spaces) as the password. Most HTTP clients handle this automatically when you provide a username and password field.
One important note: Application Passwords require HTTPS. They will not work on HTTP sites. If your WordPress site does not have an SSL certificate, resolving that is a prerequisite for API-based automation.
A 5-Step End-to-End Publishing Workflow
Here is the complete sequence for taking a finished article from your content pipeline into a published WordPress post:
- Prepare the content payload. Assemble the post fields: title, HTML body, excerpt, slug, and any taxonomy IDs for categories and tags. If your content is in Markdown, convert it to HTML before sending — WordPress stores and renders HTML, not Markdown.
- Upload the featured image. If you have a featured image, upload it first via
POST /wp-json/wp/v2/mediawith the image file as the request body and the correctContent-Typeheader. The response includes anidfield — pass this asfeatured_mediawhen creating the post. - Resolve category and tag IDs. WordPress taxonomies are referenced by numeric ID, not by name. Query
GET /wp-json/wp/v2/categories?search=YourCategoryto find the ID for each category you want to assign. If the category does not exist, create it first viaPOST /wp-json/wp/v2/categories. - Create the post. Send a
POSTrequest to/wp-json/wp/v2/postswith your full payload and credentials. On success, WordPress returns the created post object including its ID, URL, and status. Verify thestatusfield matches what you sent. - Confirm and log the result. Store the WordPress post ID and published URL alongside your content record. This lets you retrieve, update, or delete the post later without searching for it. Log any API errors — a failed request silently not publishing is worse than a visible error you can investigate and retry.
Five Mistakes That Break Most Automation Setups
Using your account password instead of an Application Password
Hardcoding your main WordPress admin password into a script or workflow tool is a significant security risk. If that credential leaks, an attacker has full admin access to your site. Application Passwords are scoped, revocable, and do not grant access to the WordPress admin interface — they are the correct tool for API authentication.
Sending Markdown instead of HTML
The WordPress REST API stores content as HTML. If you send raw Markdown, the post will display the raw Markdown syntax rather than rendered content. Always convert Markdown to HTML before your API call. Most languages have a reliable Markdown-to-HTML library available.
Referencing categories and tags by name rather than ID
The categories and tags fields in the posts endpoint require numeric IDs. Passing a string like "SEO Automation" either silently fails or throws a validation error depending on the WordPress version. Build a lookup step into your pipeline that resolves names to IDs before calling the posts endpoint.
Skipping the featured image upload step
Featured images cannot be sent as part of the post creation request. They must be uploaded separately to the media library, and the returned ID passed as featured_media. Automations that skip this step end up with posts that have no featured image — which affects how posts appear in social sharing previews and on your blog index page.
Publishing directly to publish status with no review step
For fully automated pipelines, jumping straight to published status with no human checkpoint is risky in the early stages. Until you have validated that your content quality, formatting, and SEO fields are consistently correct, use draft or pending status. Publish manually after a quick review. Once the pipeline is proven reliable, shift to publish for hands-free operation.
WordPress Auto-Publishing Checklist
- WordPress site is on HTTPS (required for Application Passwords)
- Application Password created under Users → Profile in WordPress admin
- Content converted to HTML before API submission
- Category and tag IDs resolved before creating the post
- Featured image uploaded via
/wp-json/wp/v2/mediaand ID stored - Post creation response logged with WordPress post ID and published URL
- Error handling in place to catch and alert on failed requests
If you want the full pipeline — from keyword research through article generation to WordPress publishing — try Zorenax free with 12 credits. The auto-publishing feature handles the REST API integration, featured image upload, and taxonomy assignment automatically. Your articles go from brief to published without a manual step in between. See the pricing page for credit costs.
Frequently Asked Questions
Does auto-publishing work with any WordPress hosting provider?
Yes, as long as the site is on HTTPS and the REST API is not blocked. The WordPress REST API is available on all standard hosting environments: shared hosting, managed WordPress platforms, VPS, and dedicated servers. Some security plugins can restrict REST API access by IP address or disable unauthenticated access — Application Passwords authenticate the request, so they are not affected by restrictions on unauthenticated endpoints.
Can I schedule posts for a future date rather than publishing immediately?
Yes. Set "status": "future" and include a "date" field in ISO 8601 format (e.g., "2026-07-01T09:00:00") in your request. WordPress will hold the post and publish it at the specified time. Note that the date should be in the timezone configured in your WordPress settings under Settings → General.
What happens if a category or tag does not exist yet in WordPress?
The API returns a validation error if you pass an ID that does not exist. Your pipeline should handle the case where a category or tag is new by creating it first. Send a POST to /wp-json/wp/v2/categories with {"name": "New Category"}, capture the returned ID, and use that ID in your post creation request.
How do I update an existing post rather than create a new one?
Send a POST request to /wp-json/wp/v2/posts/{id} where {id} is the WordPress post ID. Only include the fields you want to update — unchanged fields can be omitted. This is how you handle article revisions, correct errors in published posts, or update evergreen content without republishing.
Is there a risk of duplicate posts if automation runs more than once?
The WordPress REST API does not deduplicate posts based on title or slug — it creates a new post every time a valid request is received. Your pipeline needs to track which articles have already been published (store the WordPress post ID on creation) and check this record before submitting. Without this safeguard, retries or workflow restarts will create duplicate posts.
Conclusion
Auto-publishing to WordPress is a solved problem. The REST API is reliable, well-documented, and built into every WordPress installation. Application Passwords provide secure, scoped authentication without touching your main admin credentials. The five-step workflow — prepare content, upload image, resolve taxonomy IDs, create post, log the result — covers the full sequence from draft to published URL.
What separates teams that successfully automate WordPress publishing from those who start and abandon the project is not technical complexity — it is the discipline to build the pipeline correctly from the start. Resolve categories by ID. Upload images separately. Handle errors explicitly. Store the returned post IDs. Those details are what make an automation you can trust to run unattended rather than one you have to monitor constantly.
Once the publishing step is automated, the bottleneck moves upstream — to content production. That is where the real leverage is: automating the research, writing, and image generation so that the entire path from keyword to published post runs without manual intervention.
Try Zorenax free with 12 credits
Find keyword opportunities, generate articles, and publish to WordPress automatically.
WordPress Publishing
Publish articles directly to your WordPress site — no copy-paste, no manual formatting.
See WordPress PublishingAuto Publishing
Schedule your full SEO content pipeline to run automatically — from keyword to published article.
See Auto PublishingGet better at
SEO automation.
Join Zorenax and start creating SEO-ready content with AI.
Try For Free